

For almost a year now, hundreds of workers have enjoyed more or less the pleasure of attending video conference meetings. Although most of these work meetings are very casual, you can calm down the atmosphere a bit and have a little laugh with colleagues by using filters.
Used in real time, these magnified reality effects are sometimes directly integrated into applications. This is the case with Zoom, which already has a limited number of filters, but it added a new function called Studio Effects to allow you to change certain features of your face.
You can go even further by configuring a third-party application that is completely dedicated to filters such as the Snapshot application, which can be integrated into your meeting software.
Download Zoom for Windows (Free)
Download Zoom for MacOS (Free)
Download Zoom for Linux (Free)
1. Access the filters during the meeting
Zoom in and create or join video crowd. In the lower left corner of the window, click the drop-down menu associated with the camera icon and select Video Filter.

2. Use a filter in your video
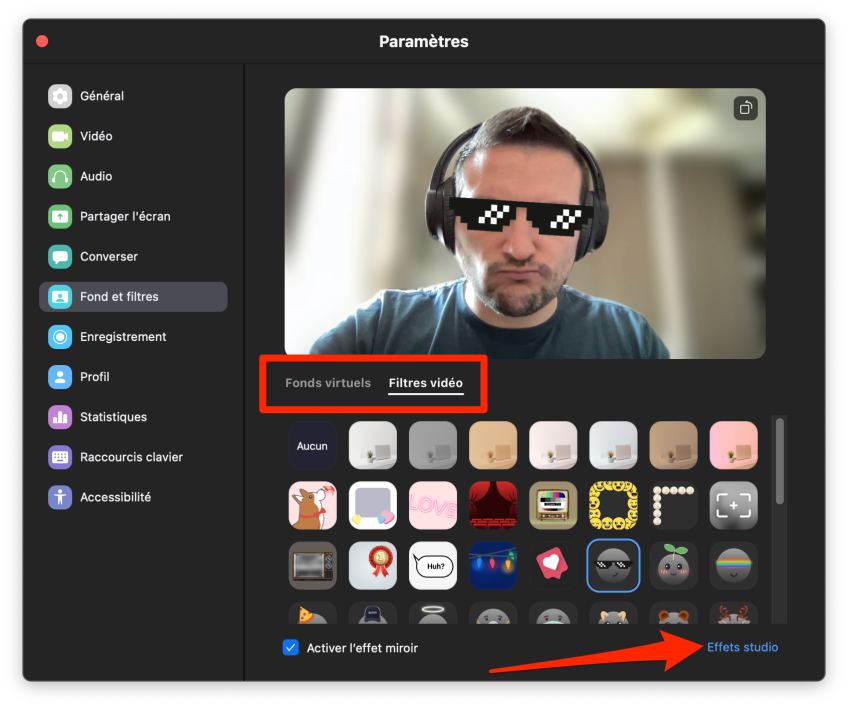
In’s window Settings It will appear in the dedicated section Background and filters, You can select a virtual background (or blur the background) or select one of the video filters in the zoom.
Click the Studio Effects menu at the bottom left of the window to sort the panel dedicated to the new zoom function. Remember to select the box Apply for all future meetings (To avoid unpleasant surprises), select your eyebrows, mustache and beard and change the color of each one with a lipstick. All the items you have selected will be automatically transferred to your video feed in real time, which will be visible to other meeting participants.
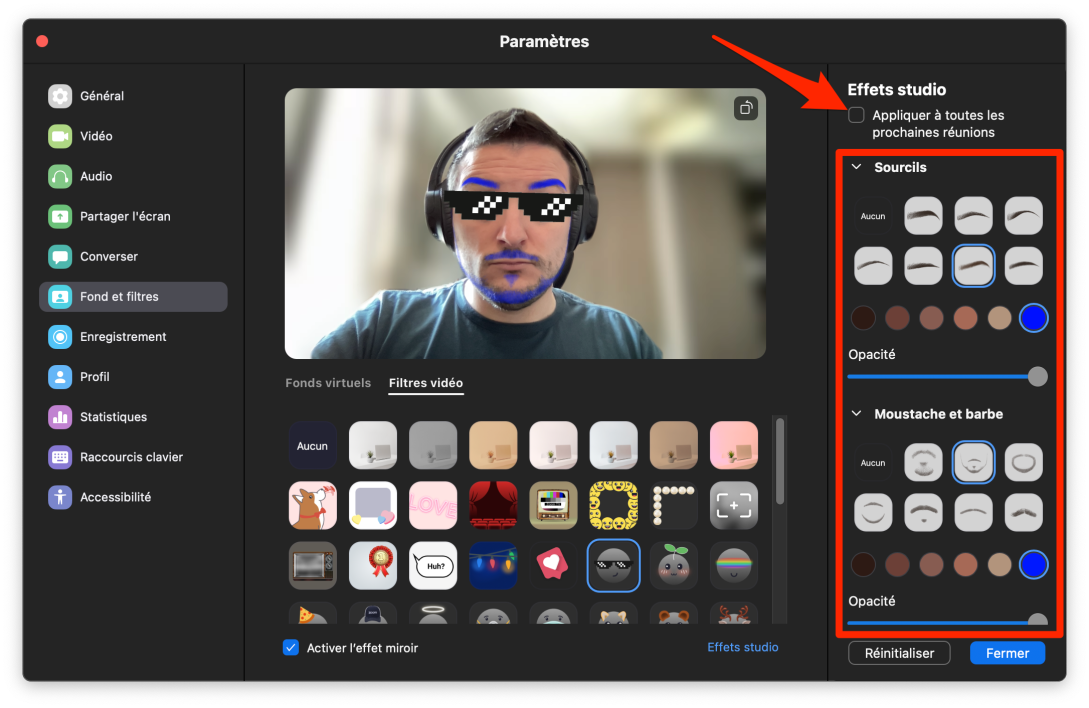
You can cancel these effects at any time by going back to the same menu to select none instead of the selected filters.
3. Use Snapshot filters
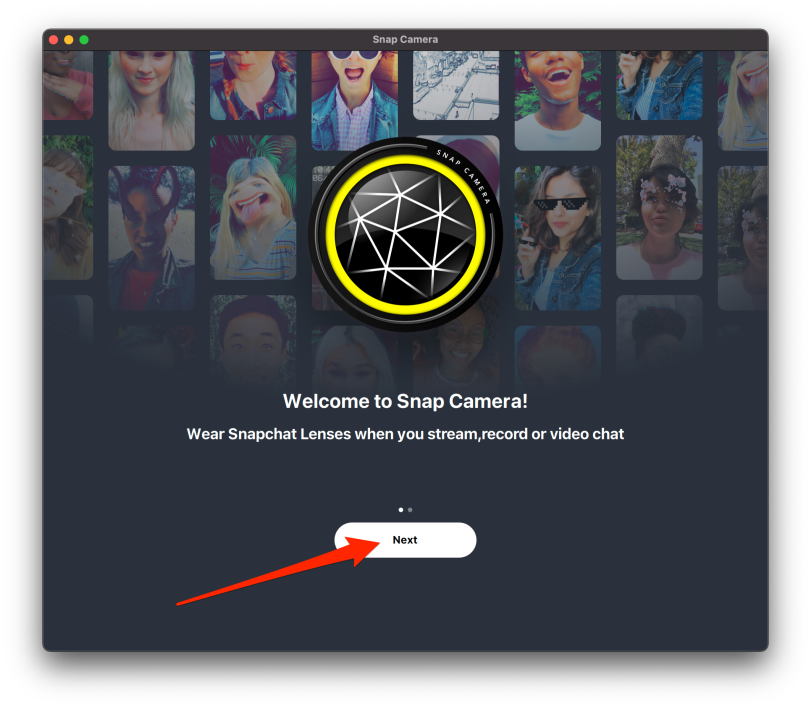
The native filters provided in Zoom are not original or particularly successful, which is possible if you want to use Snapshot filters directly in the application. To do this, start by downloading and installing the Snap Camera app on your computer.
Download Snap Camera for Windows (Free)
Download Snap Camera for MacOS (Free)
Launch the Snap Camera and go to the application presentation screens by clicking Next. Examine the many filters provided in the application and choose the one you want to apply on your face.
If you do not already have one, start a zoom meeting and click the drop-down menu associated with the icon at the bottom of the screen Photo tool And, in the area Select the camera, Select Snap camera.
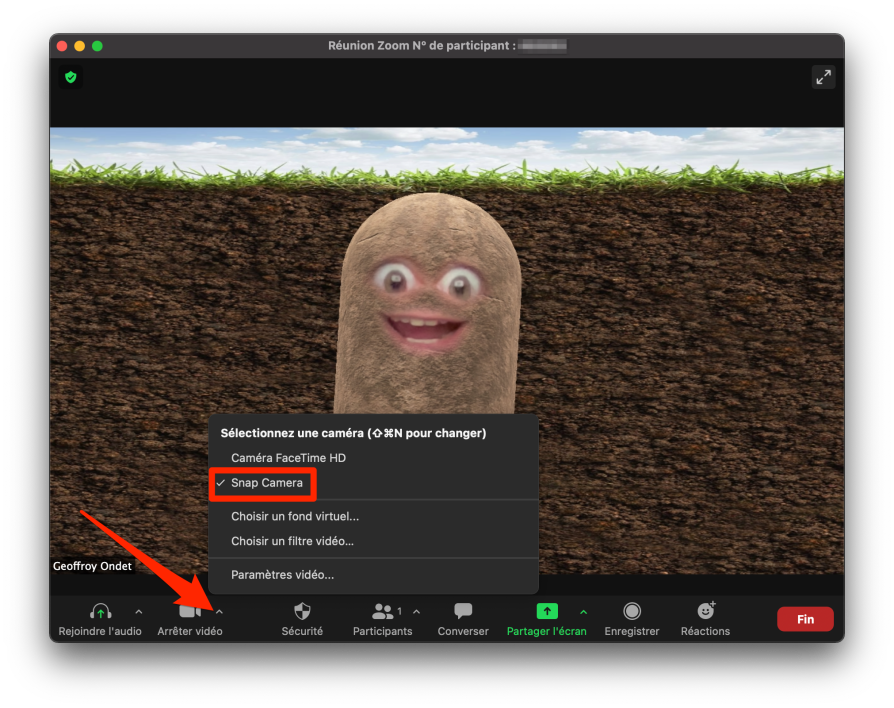
Logically, the filter you activate on the Snap camera will automatically reflect on your Zoom video. You are now ready to create a little atmosphere during your next week’s telecommunications and relax a little planning for your regular meetings.

Beatrice Ashford is a contributor at Nintendo-power.com, covering a wide range of topics including news, politics, business, technology, sport, entertainment, and lifestyle. She focuses on delivering clear, balanced reporting and useful information that helps readers stay informed about current events and emerging developments. Her work highlights stories that matter to everyday audiences, with an emphasis on accuracy, relevance, and accessible journalism that keeps readers connected to the issues shaping the world around them.