

Got a Nintendo Switch? We will tell you everything you need to know to set up your new console! You do not have to take any major hurdles when setting up, Nintendo deliberately keeps the first steps simple.
Have you recently owned a new Nintendo Switch? Congratulations! To start playing right away, you need to set up the console. The switch is ready to go in a few steps, keeping the Nintendo configuration relatively simple. We will explain step by step how to connect and configure the console.
1. Set up the Nintendo Switch: First Steps
If you have separated the handle of the switch from the box, you must first connect the two joy-con units on the sides. This is done by pulling the controller up and down. If you have a Nintendo Switch Lite, this step is not required as Joy-Cons is permanently installed here. On the top left is the Power Button next to the volume buttons. Press the power button to turn on the Nintendo Switch. If necessary, fully charge them beforehand.
In the first step, you now specify the language you want. Then you choose your area. For example, the choice of region will have an impact on the availability of games on the Nintendo ESHB. You can change this area in the system settings.
Then you can read through the user agreement. Anyway, you have to tick “Accept” at the end to continue the setup.
2. Set up the WLAN link and select the time zone
In the next step, the computer will automatically scan the WiFi networks in your area. It’s a good idea to immediately connect to your preferred network and have your WiFi password ready. If you wish, you can skip this step for now and then do it at some point. After selecting your time zone, you can now connect the switch to the TV or do this later.
3. Connect the Nintendo Switch to the TV

The dock is connected to the TV via an HDMI cable.
Built in: Run on © 2017
If you have a standard model of the Nintendo Switch, you can connect it to your TV via the dock. This is not possible with the Nintendo Switch Lite, this model is for portable operation only.
To connect your switch to the TV, you must first remove the Joy-Con controller from the port. To do this, press the small release button on the back of the joy-con unit and pull the controller up. With the left unit stick you can now select “Next” and confirm your choice with the A button.
In addition to the dock, HDMI cable and power are required to connect to the TV. Now connect the power supply unit and the HDMI cable to the dock by moving the flap on the back. If you have everything connected correctly, confirm with the “Next” button. Slide the handle into the dock so that the display is facing forward. After a while, the switch menu will appear on your TV. If so, confirm this on the switch to continue the setup.
Useful accessories for your switch (Lite)
Do you still need parts for your switch or switch light? For example a caring case or screen protector? In In this overview you can find everything you need for your new console.
4. Define avatars and nicknames and set parental controls
Now you can define an avatar and nickname. This information can be viewed by other games such as Online Duels. Decide on your favorite icon, but you can change it anytime you want. Here is your chance to create your own avatar. There are many customization options – face, mouth, nose or hair.
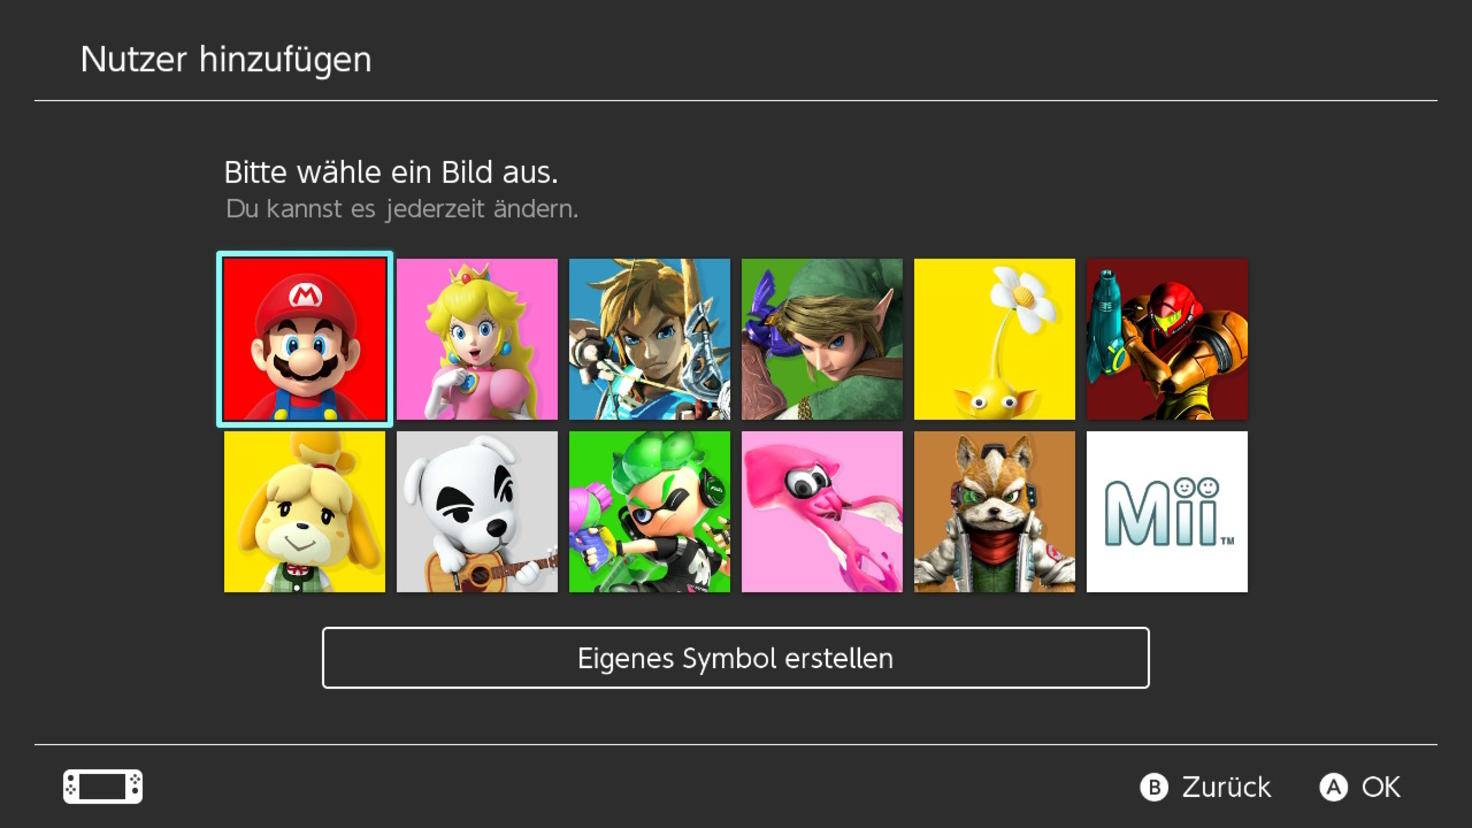
As an avatar you can choose a popular Nintendo character or create a Mii for yourself.
Built in: © Run on Nintendo / Screenshot 2021
Once you are done, you can set parental restrictions if you want the children to have access to the console. Setup is complete, now press the Joy-Con Home button on the right to go to the Dashboard. That’s it, now you can start playing.
5. Create an eShop account and download your first games
Nintendo Switch has its own online store, Eshop, where you can download games digitally. To do this, you need a Nintendo account that you can access in the best way possible Set up the official website. Once setup, select the Yellow Shopping Pack icon in the main menu on the switch, log in to your Nintendo account and browse eShop.
Storage location reference
Note: The internal memory of the Nintendo Switch is very limited and there is no room for more download games. If you do not want to delete games, it is worth doing Micro SD card As an alternative to expansion, you can get mainly big titles but of course body cartridges in retail stores as well.
You will not have many games to choose from on your new Nintendo Switch. If you do not want to spend money right now, check out our recommendations for the best free games and demos that can be downloaded from eShop.
Summary: Connect the Nintendo Switch
- Connect the Joy-Con controller to the handheld
- Press the power button on the top left of the handset to start the switch
- Determine your preferred language and region
- Please read and confirm the user agreement
- Connect to your WiFi network now
- Define your time zone
- Now connect the switch to the TV
- Establish a connection between the dock and the TV via the HDMI cable and connect the power supply
- Remove the Joy-Con controllers from the port
- Slip the handle on the dock and after a while the picture will appear on the TV
- Set avatar and nickname
- Set parental controls if needed
- Press the Joy-Con Home button on the right to bring up the dashboard
- Set up a Nintendo account to access EShop. Here you will find many free games and free demos

Edward Langley is a contributor to Nintendo-power.com, covering a wide range of topics including news, business, technology, entertainment, lifestyle and current affairs. He focuses on delivering clear, balanced and accessible reporting that helps readers stay informed about important developments and emerging trends. With an emphasis on accuracy, relevance and useful insights, Edward aims to provide engaging stories and practical information that matter to audiences in the UK and beyond.