


Leaving WhatsApp in favor of another application is not easy. Although the most popular secure alternatives are signal and telegram, they both ask for a phone number that acts as a login to register the user. This centralized directory system makes it very practical for all your contacts to use the app automatically, so it acts as a trusted third party to verify the identity of each user, which in some cases can cause security issues.
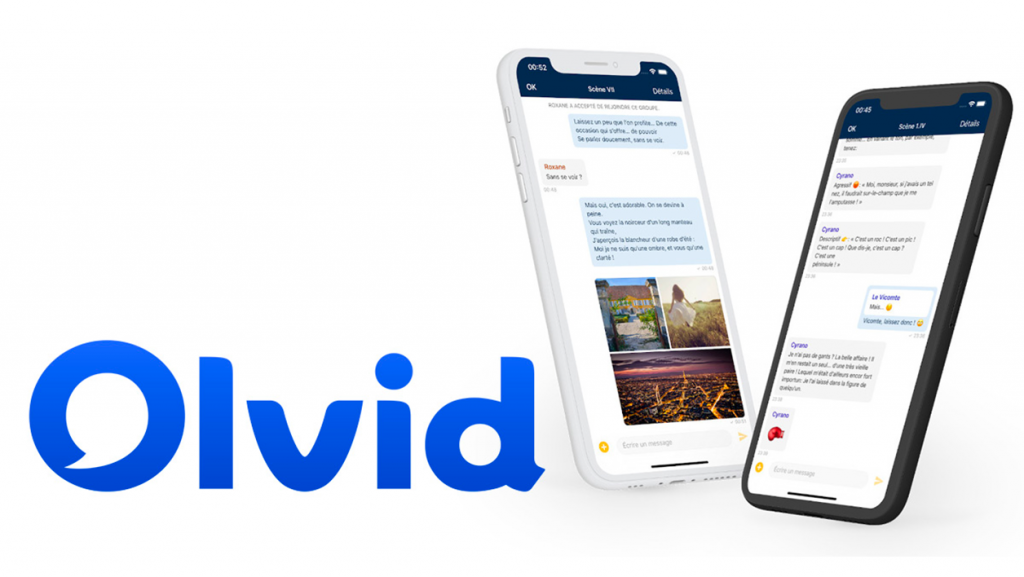
Olvit, A French messaging app that prides itself on being the most secure messaging app in the world, runs on a different model. Requires the utility to verify the identity of its users with each other using a procedure that requires the exchange of code displayed on the screen of both users. A system that is certainly more restrictive than competition, but it allows for a higher level of protection. In the following lines, you will find everything you need to know to get started with Olvit.
1. Download Olvit
Get started by downloading Olvit on your terminal. This secure messaging app allows you to send free messages with your loved ones, but calls require a subscription of 5 euros per month. More secure than WhatsApp and others, it does not use a centralized directory and requires manual verification of new contacts.
Download Olvid for Android (Free)
Download Olvid for iPhone (Free)
2. Create your account
Launch the app on your device and tap on the first page that appears New user. On the My ID page, fill in the information you want to appear on your profile and press Enter Save.
Go through the presentation pages of the app, select your preferences, especially based on notifications, and verify your post using the button Welcome to Olvit.

3. Call contacts
You should come to the main page of the application, the messages are not empty, but especially the contacts. Olvid did not ask for your phone number or email address, it does not manage a central directory and therefore cannot find your contacts using it. So you need to add and verify your contacts manually to chat.
To add your first contact, press the button + Blue. Olvid will display your ID with the QR code. If your potential contacts are on your side, they may follow the same process and accept your invitation by scanning your displayed QR code.
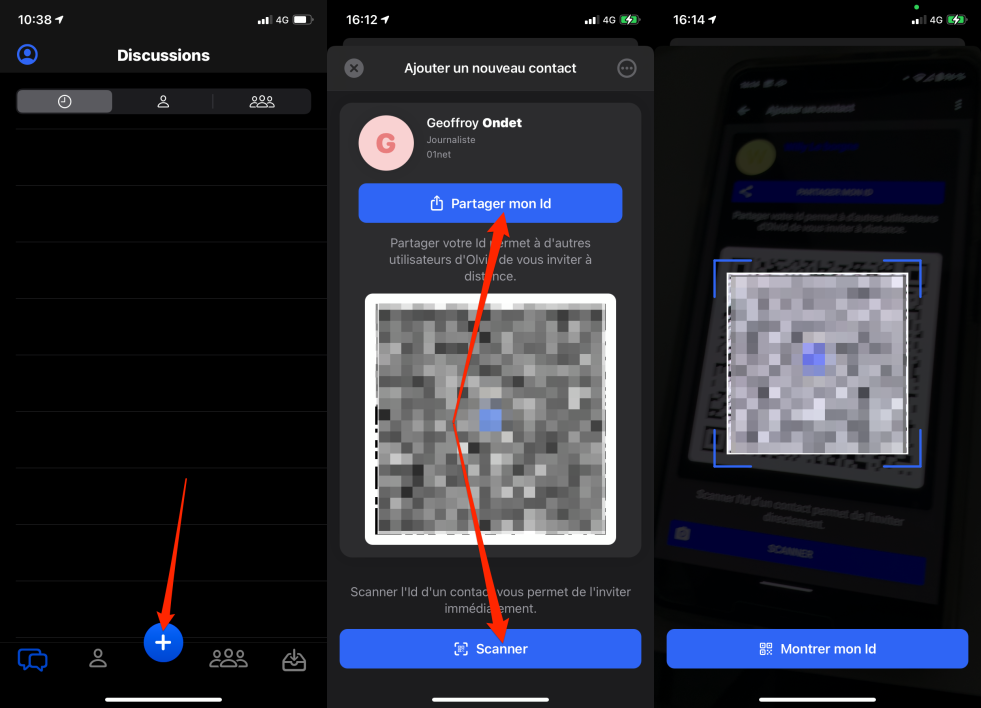
On the other hand, if your contacts are not on your side, you should use the function Share my ID Application to send your invitation in other ways. For example, it can be a copy-paste link in any email application. The person you are calling should only click on the link you received to join you at Olvit.
You will be asked Confirm the call. To do this, press Send invitation.
Receive their call after your contact and press in the inbox in their Olvid app Accept Check the link.

4. Check your contacts
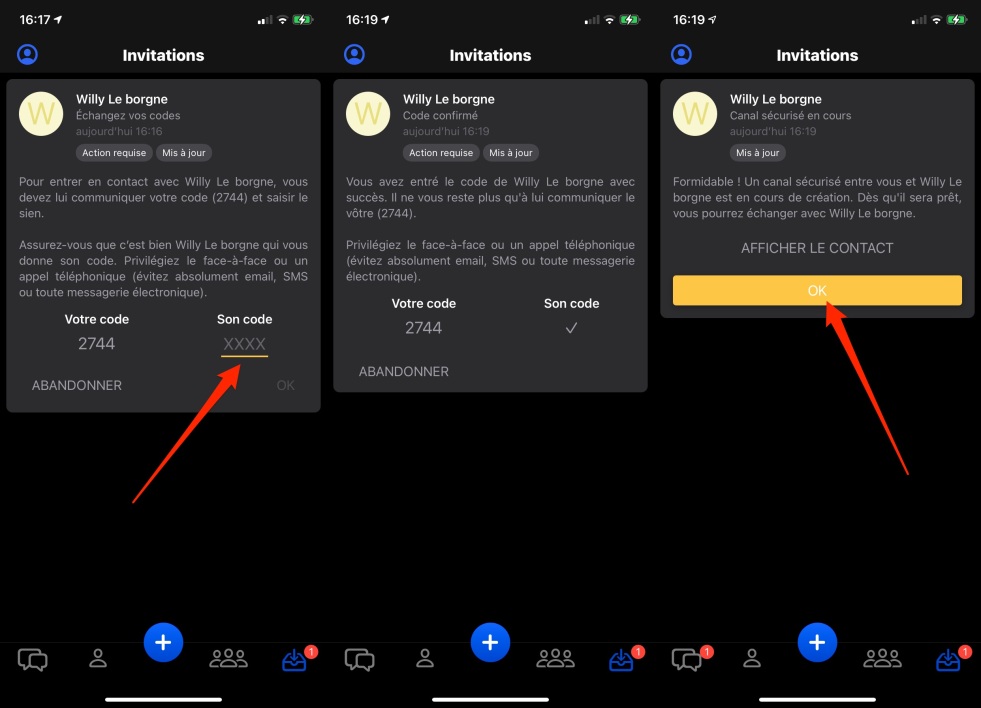
Once the call is accepted, both users will see a verification code displayed on their screen. They each need to communicate their code to others so that they both agree with each other. Only after this mutual consent is a secure conversation channel created at Olvit.
Press yourself and your contact OK To finalize the process.
5. Start the conversation
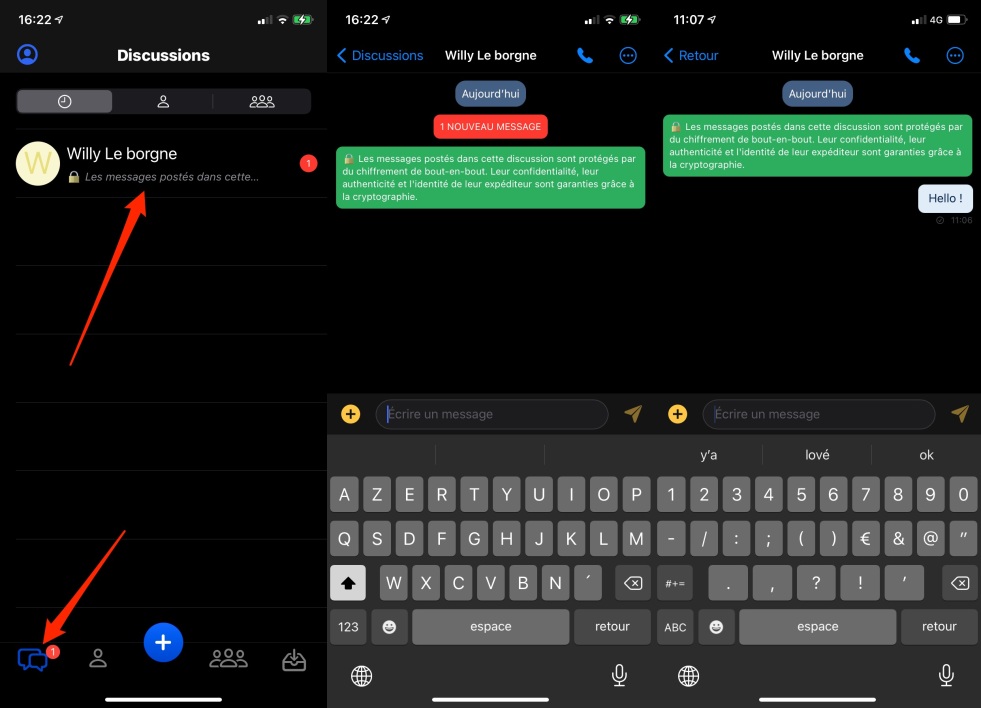
Go to the Dedicated tab for conversations to access the auto-generated discussion with your new contact. You can of course exchange text messages, but you can also scan documents, photos, videos and documents on the fly and send them to your speaker.
6. Customize the settings
Don’t forget to customize the general settings of the application. To do this, on iOS, tap your avatar and then tap the icon that indicates the cogwheel to enter the app settings.
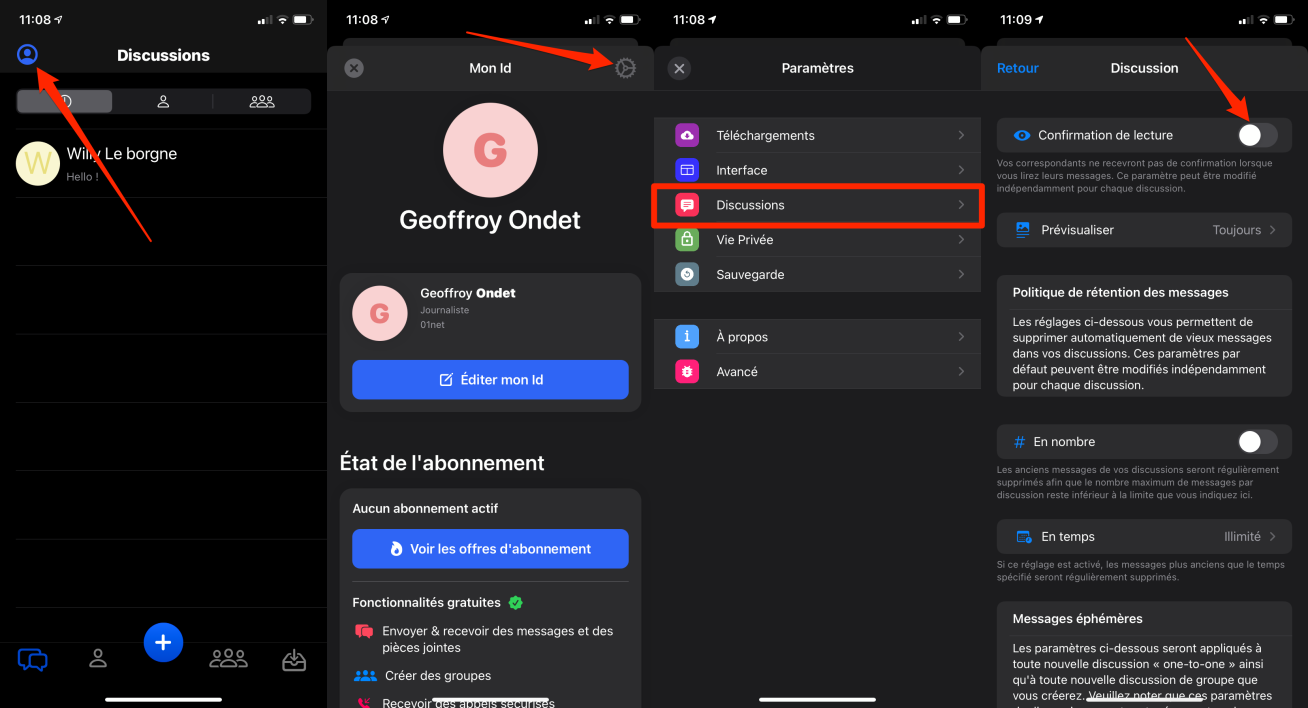
On Android, tap and enter the options menu indicated by three small dots Settings.
Review the various parameters available, in particular Discussions (iOS) and Personal life (Android) Enable / Disable Read the receipts According to your preferences.
You can also define the retention period for messages and manage options based on the visibility of intermediate messages. You can also create the backup key needed to encrypt the backup you send to the cloud from the application settings.

“Avid writer. Subtly charming alcohol fanatic. Total twitter junkie. Coffee enthusiast. Proud gamer. Web aficionado. Music advocate. Zombie lover. Reader.”


More Stories
Acrylic Nails for the Modern Professional: Balancing Style and Practicality
The Majestic Journey of the African Spurred Tortoise: A Guide to Care and Habitat
Choosing Between a Russian and a Greek Tortoise: What You Need to Know