


If you want to copy screen shots or videos from your Nintendo Switch to Mac via USB cable, this is now possible System Update 11.0.0 Or later. You need to use a free program called Android File Transfer on MacOS. Here is how to set it up.
What do you need
Before you begin, make sure your switch system is upgraded to 11.0.0 or later. Switching settings is easy to upgrade from the app. In the sidebar, select “Computer” and then “System Update”.
Related: How to update your Nintendo Switch
You will also need a full-wire compatible USB-C cable to send data free of charge. Also, keep in mind that this technique does not work via switch doc. Insert the USB cable directly into the USB-C port at the bottom of the switch.
When your cable is ready, Download and install Android File Transfer On your Mac. This free application was developed by Google and supports the Media Transfer Protocol (MTP) which uses the switch to transfer photos via USB. Android devices also use this protocol, but Macs do not have support for it, which is why Google created this app.
How to transfer screen shots and videos from Nintendo Switch to Mac via USB
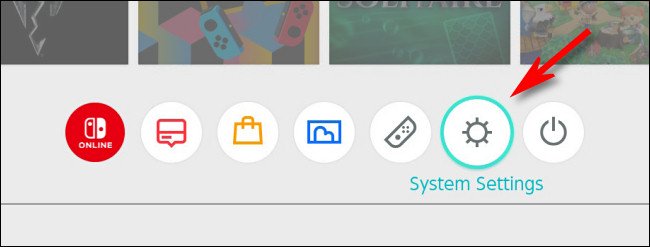
To start switching media, insert the USB-C cable into the bottom of your switch, then insert the reverse end into the USB port on your Mac. Go to the Home menu on your switch and then tap the System Settings icon (gear in a circle).
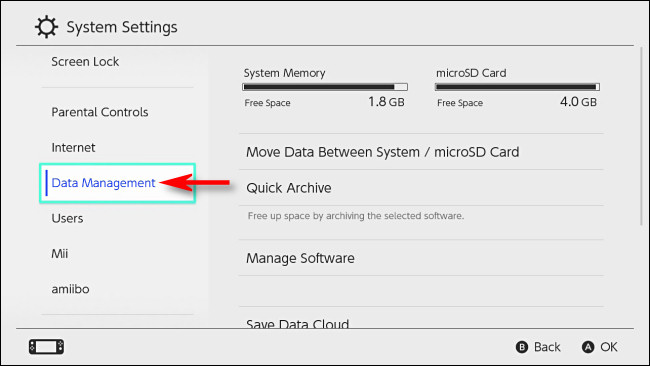
In the “System Settings” sidebar, select “Data Management”.
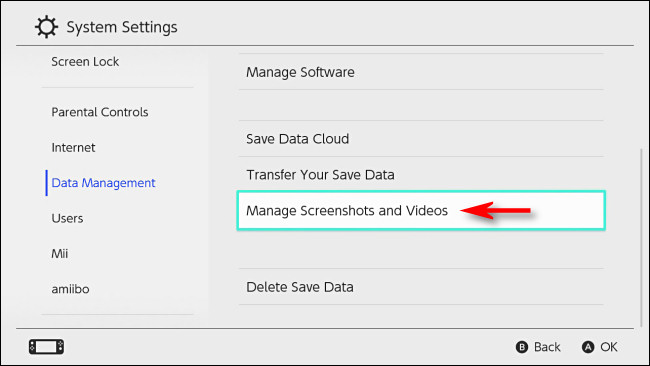
Scroll down and select “Manage Screen Shots and Videos”.
Select “Copy to computer via USB connection”.
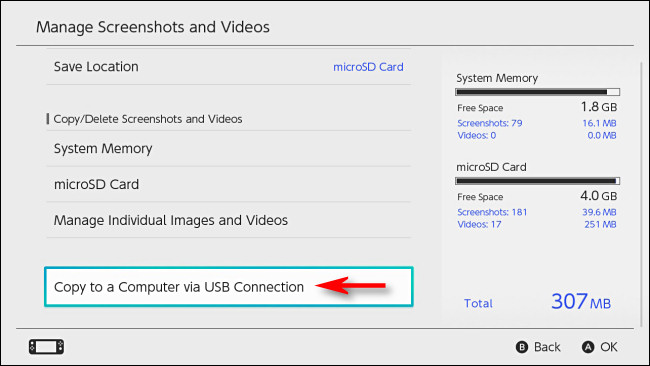
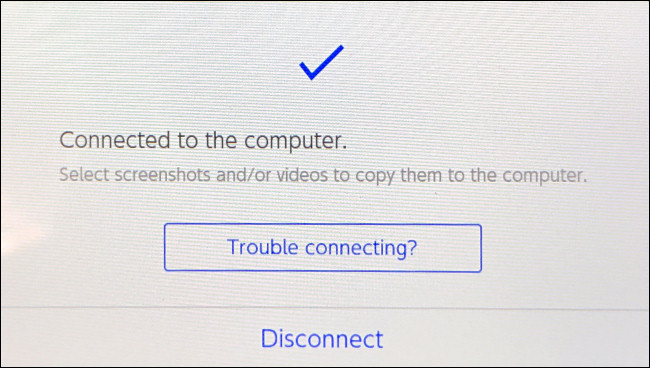
The switch will try to connect to your Mac. If it succeeds, a “connected to computer” pop-up will appear.
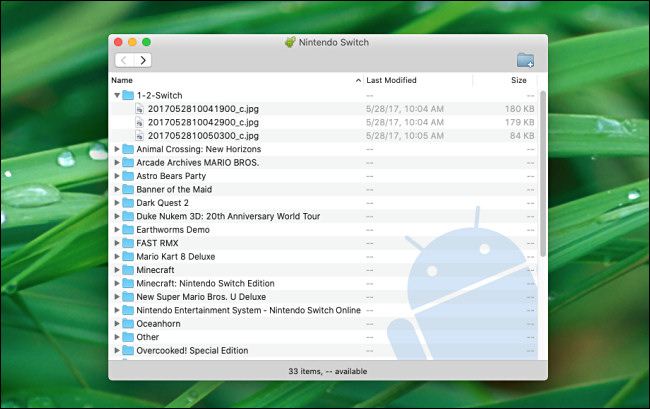
On your Mac, open the Android file transfer (software you previously downloaded). You will see a list of folders associated with software titles on your switch. In each folder, you will see a screenshot or video files from that game or application.
Tip: Screen shots taken in the switch system menus are stored in the “Others” folder.
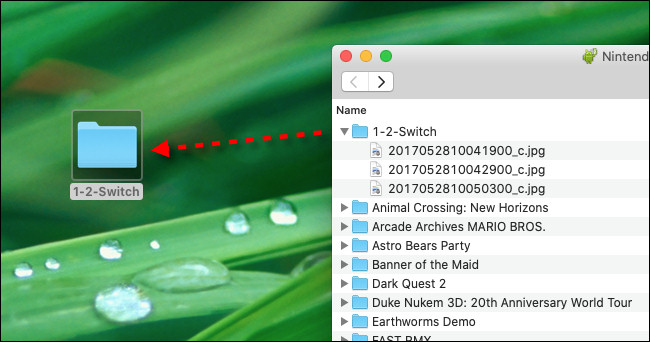
To transfer pictures or videos to your Mac, just drag and drop them into any Finder window or on your desktop. You can drag single files or folders or select their groups.
Once you take a screenshot or video file, it will be automatically copied to your Mac. When you’re done, close the Android file transfer on your Mac and then tap “Disconnect” on the switch screen. You can also disconnect the USB cable.
If the USB connection does not work for any reason, try using a different cable or port on your Mac. If all else fails, you can transfer screen shots to your Mac via microSD card.
Related: How To Transfer Screen Shots From Nintendo Switch To Computer

Edward Langley is a contributor to Nintendo-power.com, covering a wide range of topics including news, business, technology, entertainment, lifestyle and current affairs. He focuses on delivering clear, balanced and accessible reporting that helps readers stay informed about important developments and emerging trends. With an emphasis on accuracy, relevance and useful insights, Edward aims to provide engaging stories and practical information that matter to audiences in the UK and beyond.